Your cart is currently empty!
How to Make Paint Pops: A Fun and Easy DIY Activity for Kids
This post might include affiliate links. If you make a purchase using these links, I may receive a small commission, without any additional cost to you. I only endorse products that I truly believe can be beneficial for you and your family! Your support is essential in sustaining and enhancing all things Wing it with Whit. Thank you so much!
Are you looking for a creative and engaging activity to keep your kids entertained? Look no further than paint pops! This simple and fun DIY project combines the excitement of painting with the cool refreshment of popsicles, making it a perfect summer activity.
What Are Paint Pops?
Paint pops are essentially frozen paint cubes that kids can use to create beautiful artwork. They offer a unique painting experience as the paint melts and blends on paper, creating stunning effects.
Materials You’ll Need
- Washable paint (this is what we used)
- Water
- Ice cube tray or small containers
- Popsicle sticks
- Paper or canvas
- Plastic wrap (optional)
Step-by-Step Guide to Making Paint Pops
Step 1: Prepare the Paint
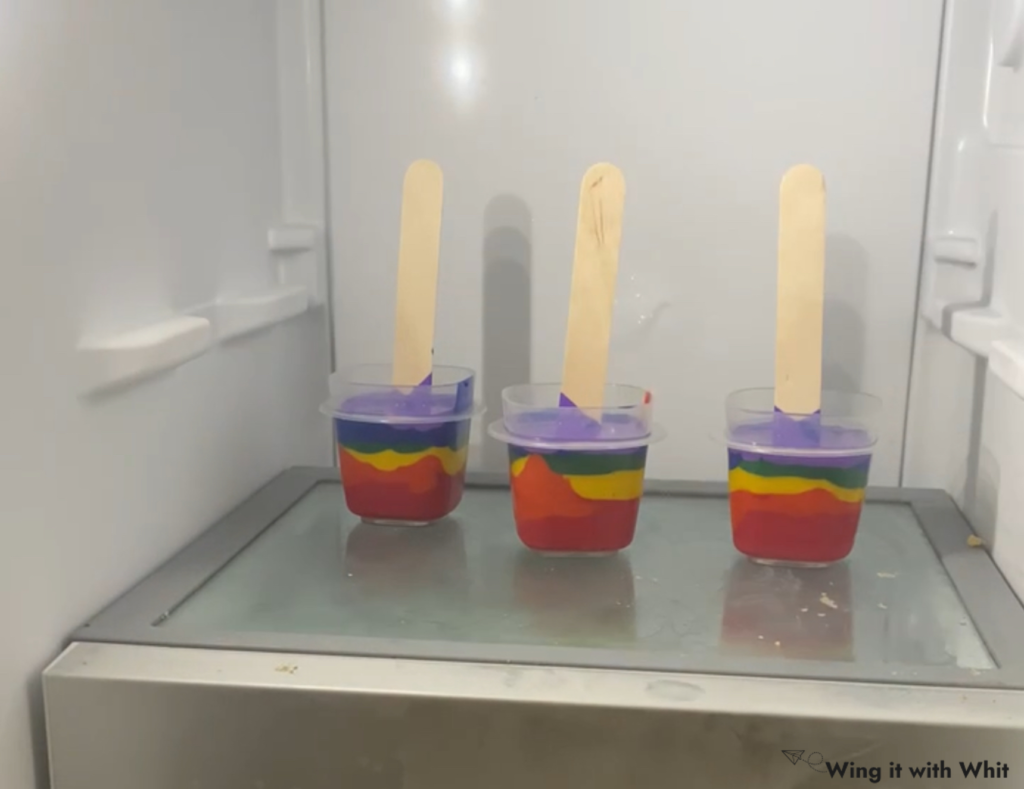
Start by choosing your paint colors. You can use a single color or mix multiple colors to create different shades. We used the colors of the rainbow! Pour a small amount of washable paint into each compartment of the ice cube tray, filling them about 3/4 full (unless you plan to add water, then fill 1/2 full).

Step 2: Add Water (Optional)
To make them more like watercolors, you can add water to each compartment, filling them the rest of the way. Use a small spoon or a stirrer to mix the paint and water together until they are well combined. This will create a slightly diluted paint mixture that freezes well.
Step 3: Insert Popsicle Sticks
Place a popsicle stick into each compartment of the ice cube tray or small plastic container. If the sticks don’t stand upright on their own, you can cover the tray with plastic wrap and then poke the sticks through the wrap to keep them in place.

Step 4: Freeze the Paint Pops
Carefully place the ice cube tray or containers in the freezer and let the paint pops freeze for several hours or overnight. Once they are completely frozen, they are ready to use!
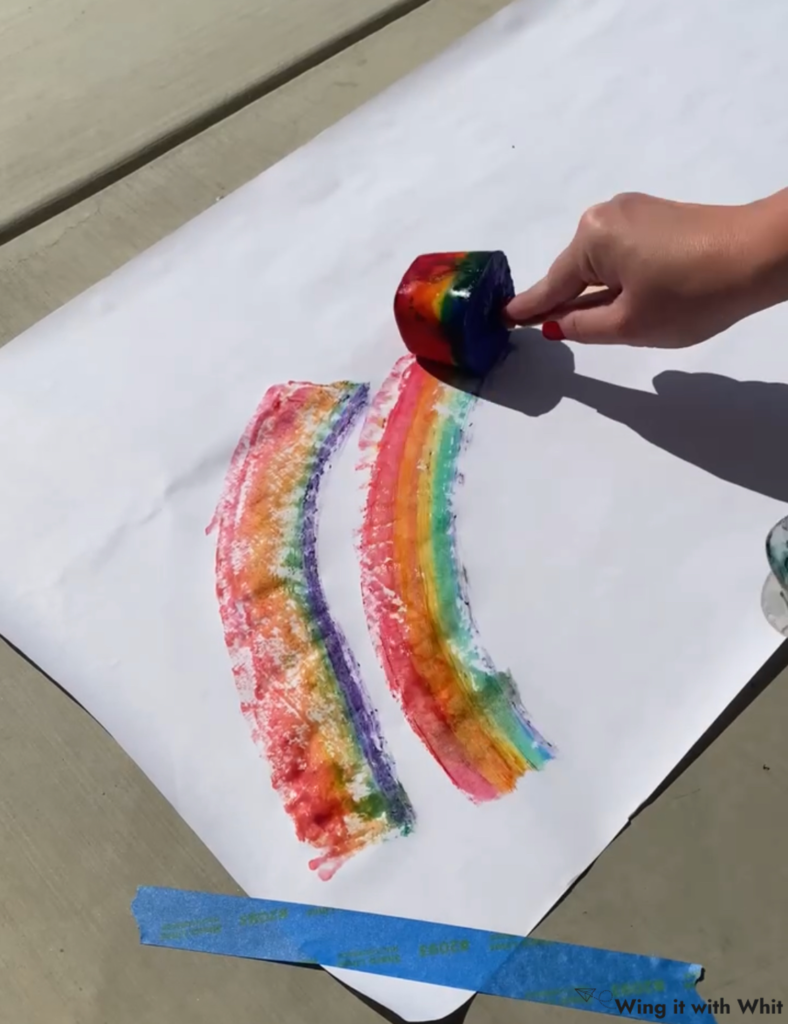
Step 5: Get Creative
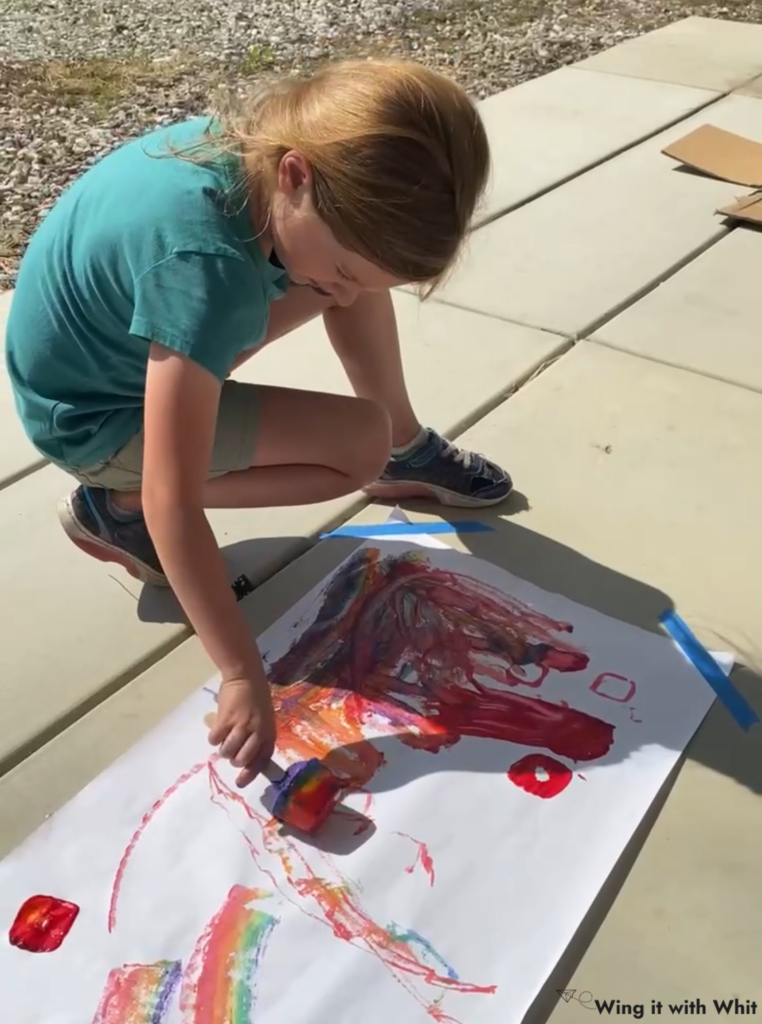
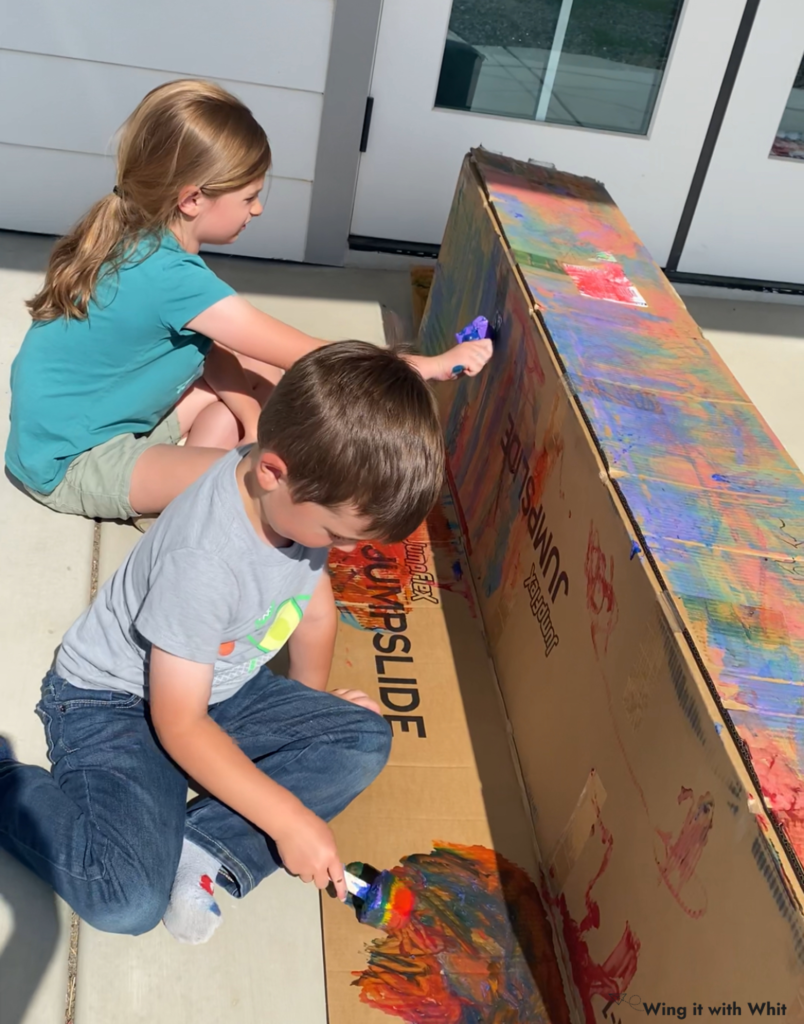
Now the fun begins! Remove the paint pops from the freezer and let your kids start painting. As the paint pops melt, they will create beautiful, water-colored effects on the paper or canvas. Encourage your kids to experiment with different techniques and color combinations.
Tips for Success
- Use high-quality paper: Watercolor paper or thick cardstock works best as it can handle the moisture from the melting paint pops. You can also use a paper roll or a cardboard box (that is what we used)!
- Supervise younger kids: While paint pops are generally mess-free, it’s a good idea to supervise younger children to ensure they don’t put the paint pops in their mouths.
- Experiment with different tools: In addition to popsicle sticks, you can use plastic forks, spoons, or even silicone molds to create different shapes and sizes of paint pops.
Benefits of Paint Pops
Paint pops are not only a fun and creative activity, but they also offer several educational benefits for kids:
- Fine motor skills: Holding and manipulating the paint pops helps improve hand-eye coordination and fine motor skills.
- Color recognition: Mixing different colors and observing how they blend enhances color recognition and creativity.
- Sensory experience: The cool sensation of the paint pops and the texture of the melting paint provide a unique sensory experience.
Conclusion
Making paint pops is a simple, affordable, and entertaining DIY activity that your kids will love. It’s a great way to keep them engaged and creative during the summer months. Plus, it’s a fantastic opportunity for some quality bonding time. So, gather your supplies and get ready to create some colorful masterpieces with your little ones!
Don’t forget to share your paint pop creations with us on social media by tagging @wingitwithwhit! Happy painting!

Whitney Berg
Hi, I’m Whitney! I’m the mompeneur behind Wing it with Whit! I am a general & special education teacher turned stay at home mom! I have a degree in Early Childhood Education and Special Education. I love sharing easy and realistic activity ideas that you can do in your own home! Thank you for being here, we LOVE playing along with you.

Must Read